Note: the information below is for you to get a better understanding of what metal framing is. We strongly urge you to contact professional service providers such as Drywall Pro-Finishing to do the job for you and please keep in mind that safety is always first. Please read the article fully, this is not a installation manual.
Another service that we provide at Drywall Pro-Finishing is metal frame installation. But, what does metal framing mean? And,
how do you do that? Today we will be exactly answering these two questions and much more. So let’s get started, shall we?
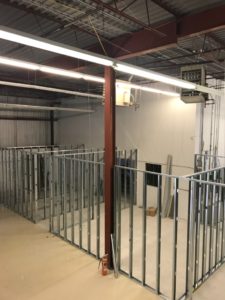
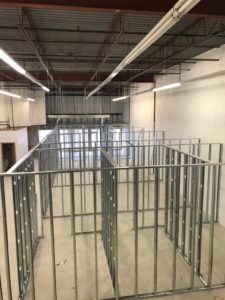
Metal framing is exactly what you though it is, metal frames provide framework for entire layout. The framing is made up of metal studs that can be placed together to form the initial skeleton of walls. It is easier said then done however. You will need to start with all the materials at hand and begin by measuring and cutting the metal frames according to the dimensions that you have available for your drywall boards to be installed in. 
After cutting the metal frames with tin snips according to your drawings or measurements that you have taken down with your measuring tape, you need to screw them in the base. There are different types of screws that you will need based on the type of floor the property has. In this example we will use a timber floor. This means you will need a wafer-head screw. There are other types of floors and different screws for them, find out what kind of floor your have and match it with the type of screw that you need to make the fastening happening. You will need a shut gun or hummer drill for concrete surface or screw gun for any other surfaces. We always emphasize on safety at Drywall Pro-Finishing, so please always wear protective gear when working onsite at all times.
You have the screws, the tools and the metal frames cut, now you can put up the metal frame but don’t screw them in yet, this is just for measurement for you take down again! You will need to cut again at the bottom 3-4 millimeters for spacing at the floor, depending on how much space indicated by your measuring tape! Now that the length of has been adjusted, you may proceed installing the metal frame.
With all of your metal frames in place, you can now proceed to install the drywall boards. The drywall boards should be cut smaller than the dimensions of the frame so that it can fit in. Once it is ready you may pair it and install it. As mentioned above, we strongly urge you not to do this yourself if you have not done it before. Aside from safety concerns, the project may cost you much more due to wasted materials and damages. At Drywall Pro-Finishing, this is what we do and we would love to do it for you!
So, why metal frames rather than wood? The chief reason metal frames do not rot, gnaw, or get deformed over time and they are durable. Let the professionals at Drywall Pro-Finishing take over and do it for you, so that you can sit back and admire your newly installed wall! We can make an onsite visitation and begun constructing the metal frame structure that you were always looking for right away. We have all the tools, materials and know-how at our disposal for a long time now and we would like to share our drywall expertise with you! Contact us today to hear how we can finish your drywall project for good, we are always looking forward to be hearing from you and we would like to wish you all the best with your future projects.
Stay tuned for more drywall-related news, articles, information and advice from Drywall Pro-FINISHING.